Theresa Resel
1/5/2022 08:17 | Hallo!
Kann man den WebPart mit Outlook verknüpfen?
LG |
|
Juerg
1/5/2022 14:12 |
Theresa,
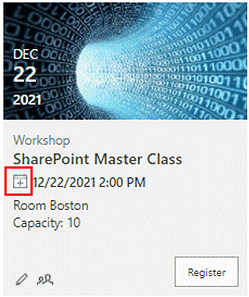
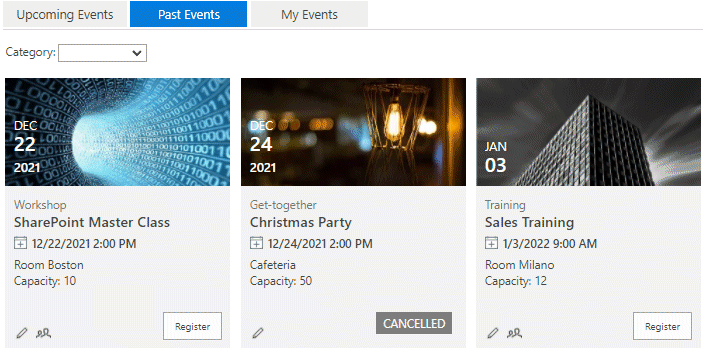
you can click the "iCal" icon to add the event to your mailbox calendar:
 |
|
Maury Arguedas Abarca
5/3/2022 01:12 |
capacity is the number of records allowed? decreases as people register? |
|
Chris Pecoraro
7/7/2022 18:59 | Is there any way to send an email automatically to somebody after they register? |
|
F. W. Conradi
7/8/2022 17:08 | Is there an attribute name for "Nbr. Attendees" that I may use to show the total registered count on an event's Field Template? ex: {Capacity}, {Location} |
|
Juerg
7/12/2022 12:20 | Maury,
"Capacity" is the max. number of attendees allowed for the event.
It is used by the web part to avoid overbooking the event. |
|
Juerg
7/12/2022 12:21 | F.W. Conradi,
we have now added the new [attendees] placeholder (to be placed into the “Field Template” setting) to display the current number of registrations as eg.
{Attachments}<h4>{Category}</h4><p style='font-size:16px;line-height:19px;font-weight:600'>{Title}</p><p style='font-weight:600;margin-bottom:4px'>[ical] {EventDate}</p>{Location}<br>[Capacity:Capacity: ]{Capacity}<br>Registrations: [attendees][button:Register]
Please re-download and then upgrade the “Event Manager” web part. |
|
Juerg
7/28/2022 12:52 | Chris,
we have now added the option to automatically send an e-mail to the user who registers for an event.
The e-mail is based on the “RegistrationEmail.txt” template file which is located on the Sharepoint web frontend server(s) at:
c:\Program Files\Common Files\microsoft shared\Web Server Extensions\16\TEMPLATE\IMAGES\AEEventManager
The template can be adapted to your needs and by default contains:
[email protected]
Subject=Event Registration
Hi {attendee},
Your event: <b>{event}</b>
Event date: {date}
Event location: {location}
Thanks for registering!
Your training department.
|
|
Tony Pannone
8/21/2022 21:10 | Is there a way to add a +1 for events? Or just additional guest?
Love this product! |
|
Lisa
3/1/2023 20:23 | Hi! does an email get sent when you unregister from an event ? |
|
Juerg
3/23/2023 15:06 | Lisa,
we have now added sending an e-mail when un-registering from an event.
Please re-download the “Event Manager” web part and then update the solution.
|
|
Tony Pannone
8/16/2023 01:30 | Hi Juerg,
Any update on the plus one option? |
|
Juerg
8/16/2023 11:24 | Tony
- should the „plus one“ also be taken into when determining if an event is sold out ?
- should there be a way to enter how many additional people (eg. more than one) will attend ?
|
|
Stéphane F
9/20/2023 17:42 | Is there a way to change the date/time to DD.MM.YYYY and 24H time instead of AM/PM on the event ?
Then translate or change the wording used "Capacity, Register etc... ?
Thanks. |
|
Juerg
9/20/2023 18:14 | Stéphane,
you actually can edit the card template via the "Edit Template" button displayed at the top of the web part.
The default template is:
{Attachments}<h4>{Category}</h4><p style='font-size:16px;line-height:19px;font-weight:600'>{Title}</p><p style='font-weight:600;margin-bottom:4px'>[ical] {EventDate}</p>{Location}<br>[Capacity:Capacity: ]{Capacity}[button:Register]
where you then can edit the above strings marked in red.
The date/time actually is formatted according to your regional settings as defined in "Site settings/Regional Settings". |
|
Stéphane F
9/22/2023 09:12 | Thanks Juerg,
But the template doesn't cover the "unregister, fully booked" or other english terms if I would like to translate more.
For the date and time it's set on the site settings and the list are using the right format, only the card still keep the US date and time format. |
|
Juerg
9/22/2023 13:42 | Stéphane,
we have now added the new "Localization" web part setting which allows you to enter the local translation of the below strings:
Search;Unregister;FULLY BOOKED!;CANCELLED;DRAFT
Please re-download the web part and then update the farm solution. |
|
Stéphane F
9/22/2023 17:57 | Thanks Juerg, that was fast. |
|
Kai Gräwe
11/13/2024 15:08 | Hi Guys,
really appreciate the work that you are doing here - but i might found a bug.
I installed the Soulitions AEListSearchWebpart2019 and AEEventManager2019 on a customers sharepoint server subscription edition and stubled across a potential error.
Everthing including showing the attendees (wich is why i installed the AEListSearchWebpart2019 in the first place) is doing alright,
until I place the AEEventManager2019 webpart on a site collection different from the root site and using it on a modern style page.
Then the show attendees-button redirects to the root site and tries to find the AEAttendees list on there.
Even if I include the "site="-Configuration in the webpart options it redirects to the root site instead of the site collection itself to find the AEAttendees list.
With classic style pages in a modern setting everything seems to be working fine.
I could be wrong but it may be because of the sub-webpart AEListSearchWebpart2019 doesnt get the variable "site" passed through.
Or it may be because the _spPageContextInfo-variable works different on modern pages from what i remember.
I am looking for a webpart just like yours - but it needs to be working on modern pages aswell, because one of my customers does everythin on modern pages now.
If you want further information or want to check out what i just found send me an email.
Your trusty german sharepoint consultant,
Kai |
|
Juerg
11/13/2024 17:00 | Kai,
we have now fixed this issue when using the web part on a “modern” SP 2019 or “Subscription Edition” site.
Please re-download it from https://www.amrein.com/apps/page.asp?Q=5852 and then update the farm solution. |
|
Juerg
11/21/2024 11:50 | Tony,
we have recently released a new version which implements the "Guests" option, so you might want to update the web part.
- The “Guests“ feature is now configurable on a per event basis:
Please add a new column named “Guests” of type “yes/no” to your “AEEvents” calendar list. - You now can specify the “Nbr. Of Guests” label in the registration form via the web part’s below “Options” setting:
guestslabel=Your label goes here
- The attendee list popup now displays the number of guests.
|

 Exceptionally positive experience with Amrein AG so far. We have already referred number of customers we were building various portal and Intranet solutions for to purchase some of your web parts. Thank you!


 Deployment Instructions for SP 2010

 Post a Comment


